Tools Introduction Class
Tools Feature & Advantage Introduction Class
Tools Operation and Application Class
Tools Maintanence and Repair Class
Tools Quality Checking and Certified Class
Tools Torque Introduction
Marketing Service Area
Member post
Why Do Flares Fail? 4 Common Flaring Problems Explained
Popularity : 4You followed the steps and finished flaring the tube — so why does the flare still end up crooked, scratched, or even cracked?
Finishing the flare doesn′t mean it′s actually good.
This article starts from what the finished flare looks like, walking you through 4 common flaring problems:
- Crooked flare
- Surface damage
- Cracked tube end
- Uneven thickness
1|What Should a Normal Flare Look Like?
Before going through the common problems, it helps to first set up a basic way to judge a flare.
For a normal flare, start by checking a few things:
- Even, smooth forming around the flare
- Smooth inner surface
- Even height and thickness all around
- No visible scratches, cracks, or deformation
In short:
It′s not enough for the tube end to simply flare open — it also needs to be complete and even.
After flaring, it′s worth spending a few extra seconds checking the tube end — often more important than moving straight on to the connection.
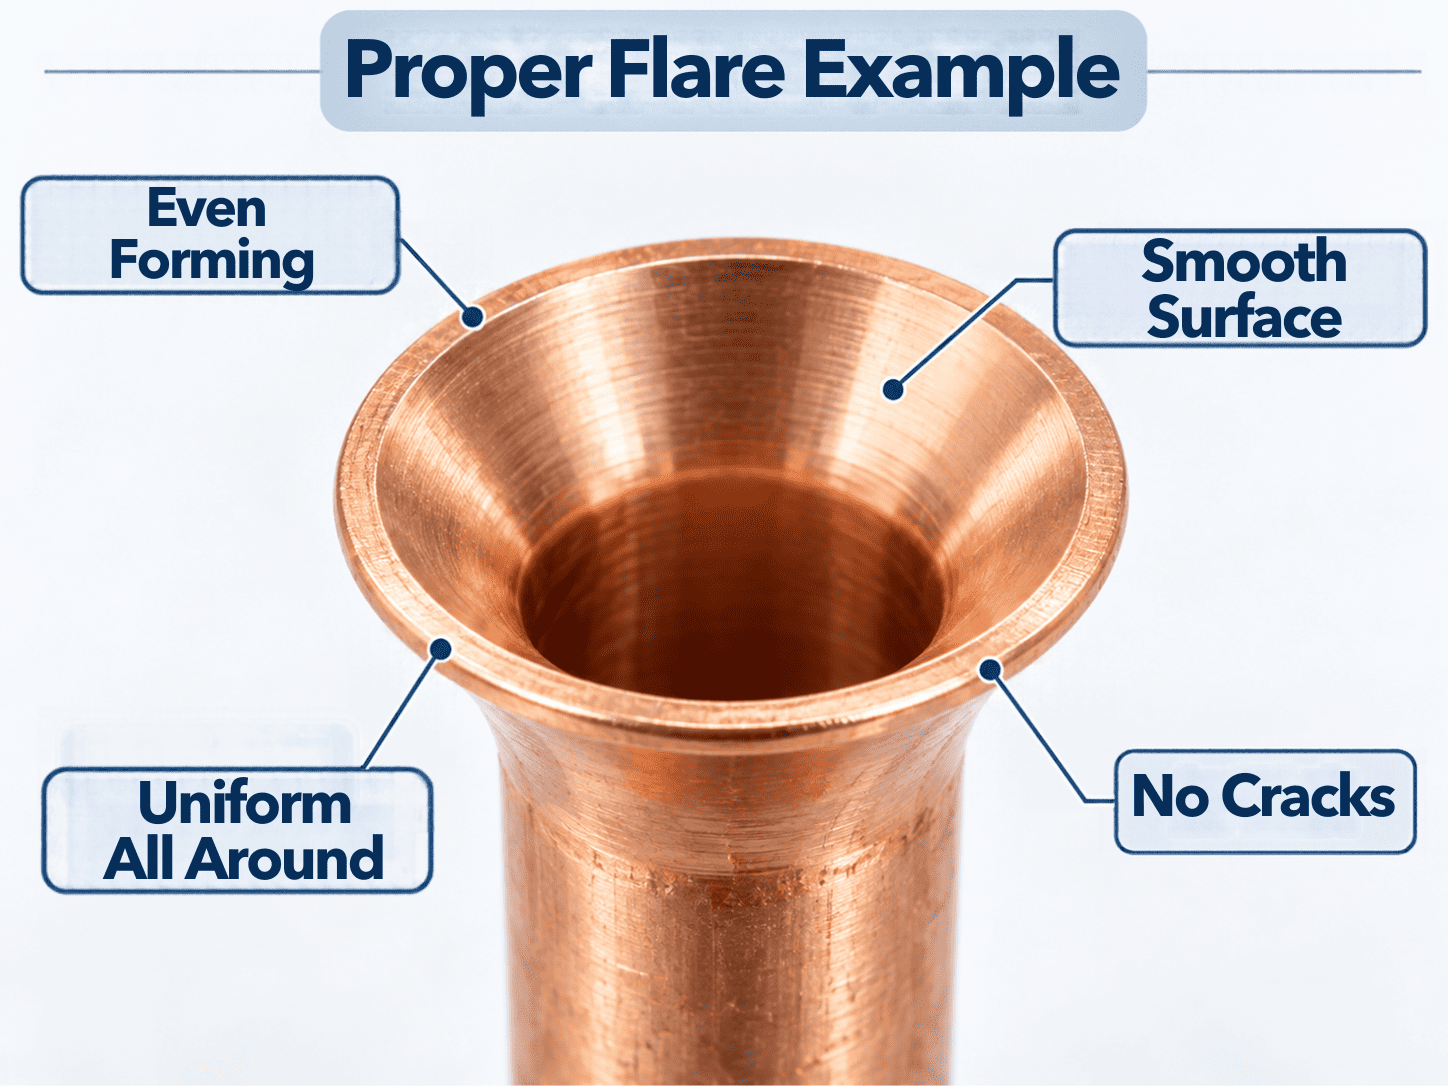
Normal flare diagram
2|Problem 1: Crooked Flare
What does it look like?
A normal flare should open evenly outward around the center of the tube end. If, once finished, you see:
- One side is noticeably higher (as shown by the left arrow in the image)
- The whole cone leans to one side
- The forming is asymmetrical left to right (as shown by the lower, narrower side on the right in the image)
that counts as a clearly crooked flare.
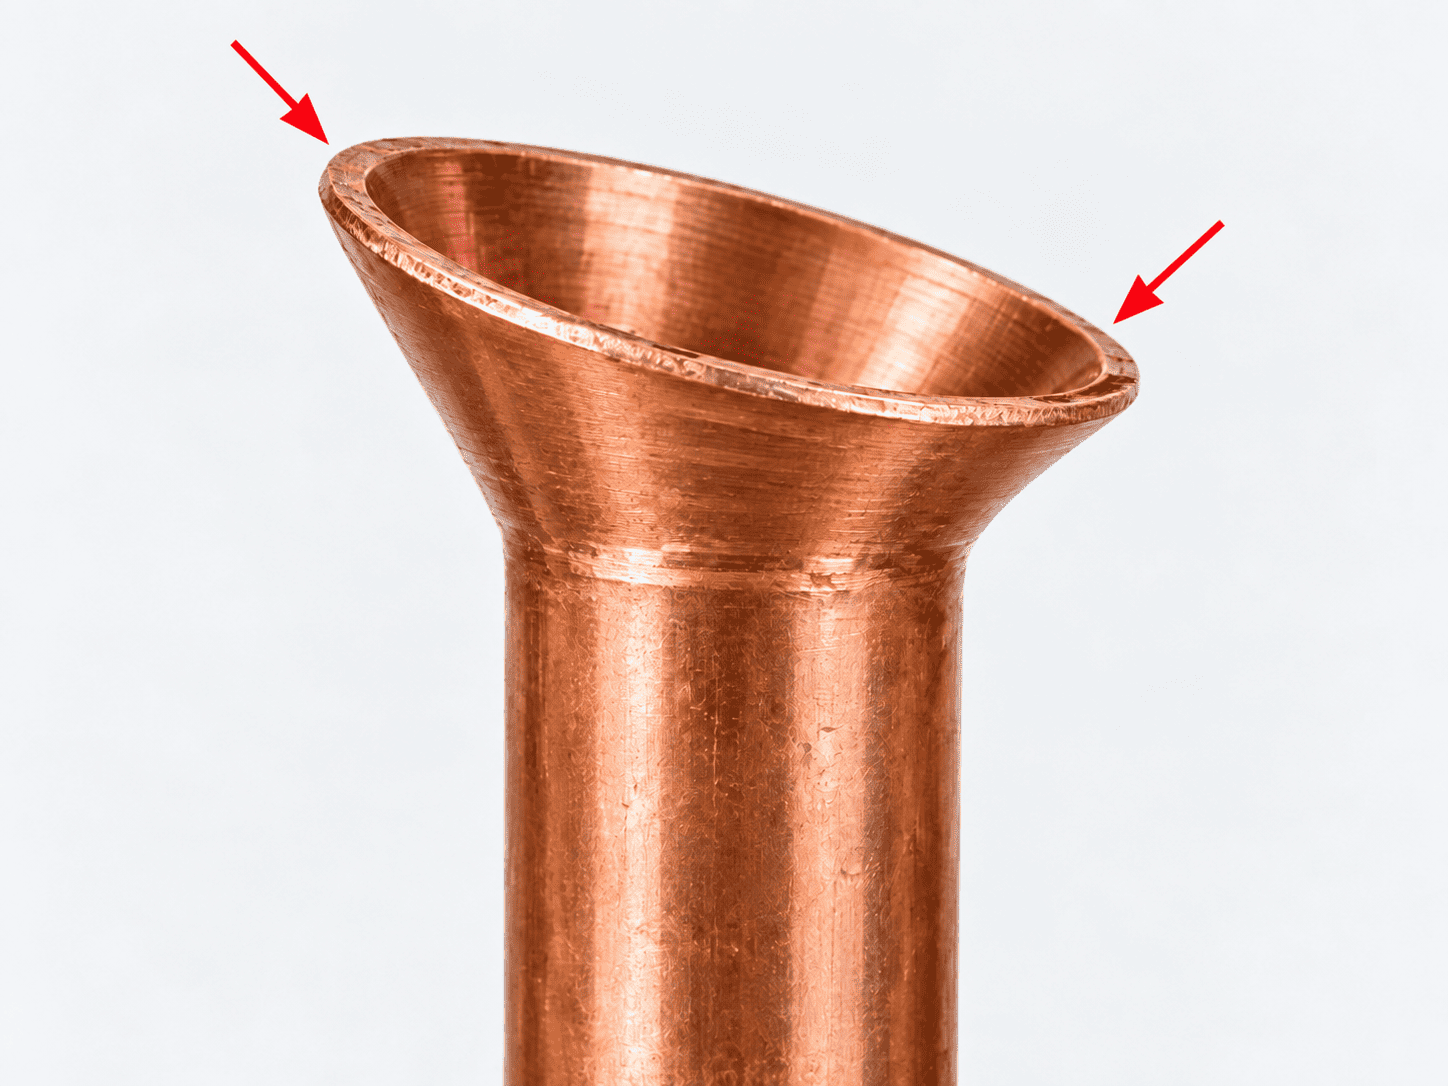
Crooked flare
What should you check first?
When you spot a crooked flare, go back and check:
- Whether the copper tube was cut flat and square
- Whether the tubing was seated straight in the clamp
- Whether the flaring cone is centered on the tube end
- Whether the tubing shifted during flaring
So when you see a crooked flare, the flaring step itself may not be the only thing to check — cutting, clamping, and centering the tool can all be worth re-checking.
3|Problem 2: Scratches or Surface Damage on the Flare
What does it look like?
The inner surface of a normal flare should stay smooth.
If, once finished, you can see:
- Visible scratches
- Dents
- A rough surface
- Localized damage
it′s worth re-checking the forming result.
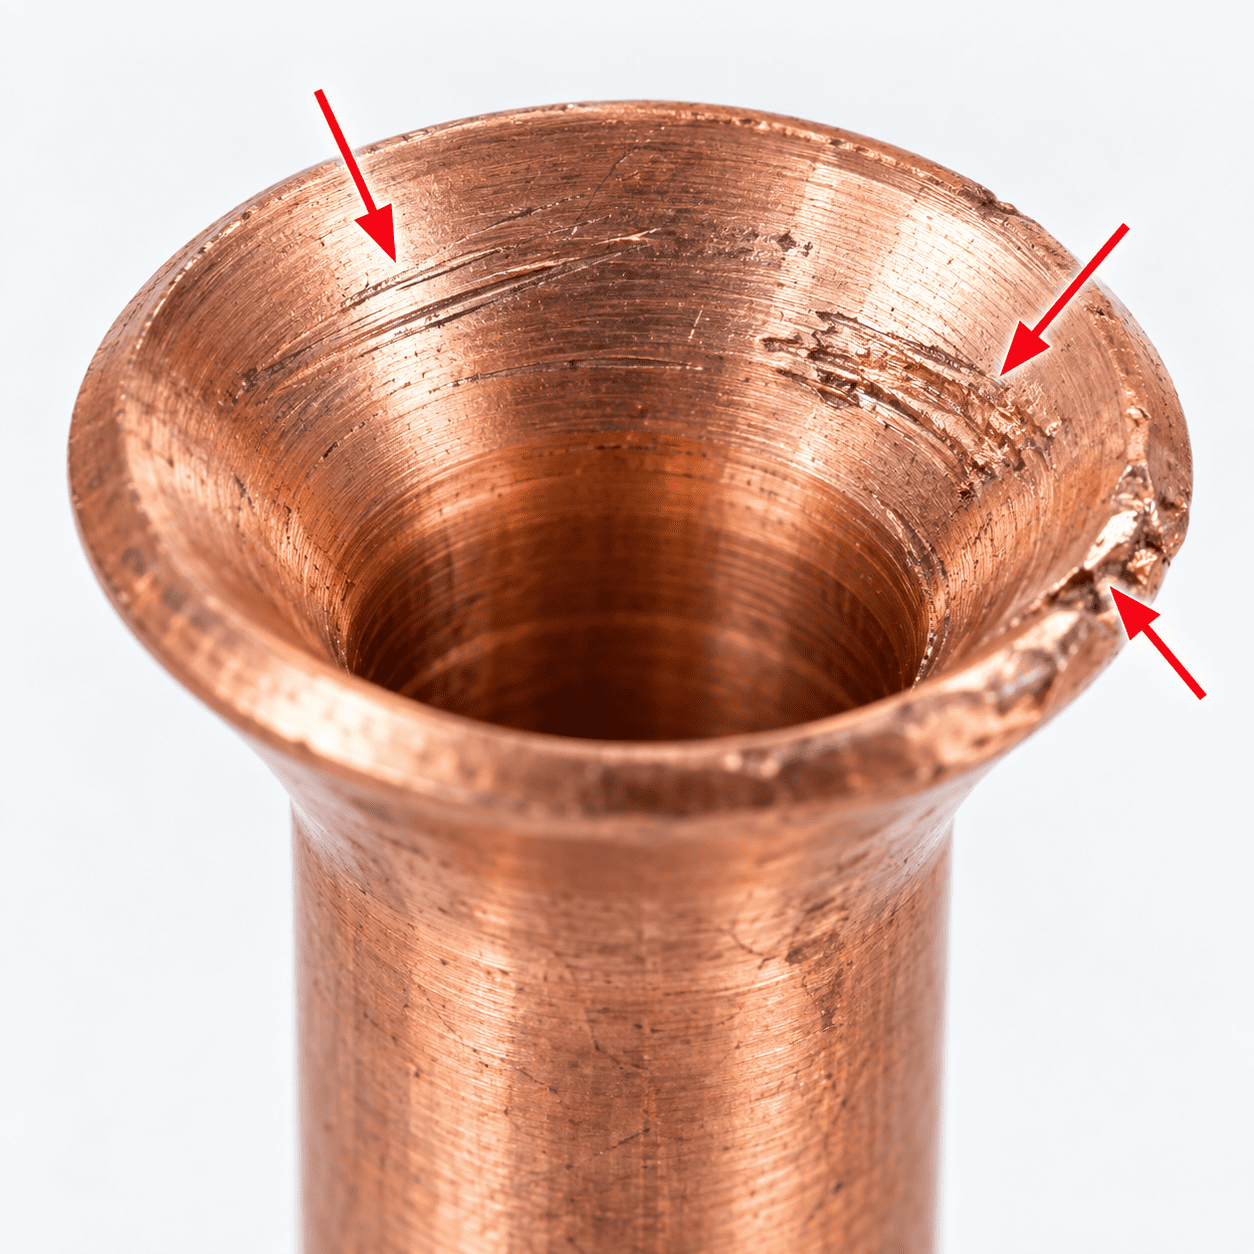
Surface scratches and damage
What should you check first?
If the surface shows damage, start by checking:
- Whether burrs from cutting were fully removed
- Whether the tube end already had scratches or deformation
- Whether the tube end was kept clean
- Whether the tube end was in normal condition before flaring
This is also why it′s not a good idea to go straight from cutting into flaring.
Cleaning up the tube end first, before moving on to the next step, lowers the chance that the previous process affects the quality of the flare.
4|Problem 3: Cracks in the Flare
What does it look like?
Cracks can appear at the edge of the flare, or along the cone surface.
Some are just fine hairline cracks; others are clearly split open.
Regardless of size, once a tube end has a visible crack, it should no longer be treated as a normal, usable flare.
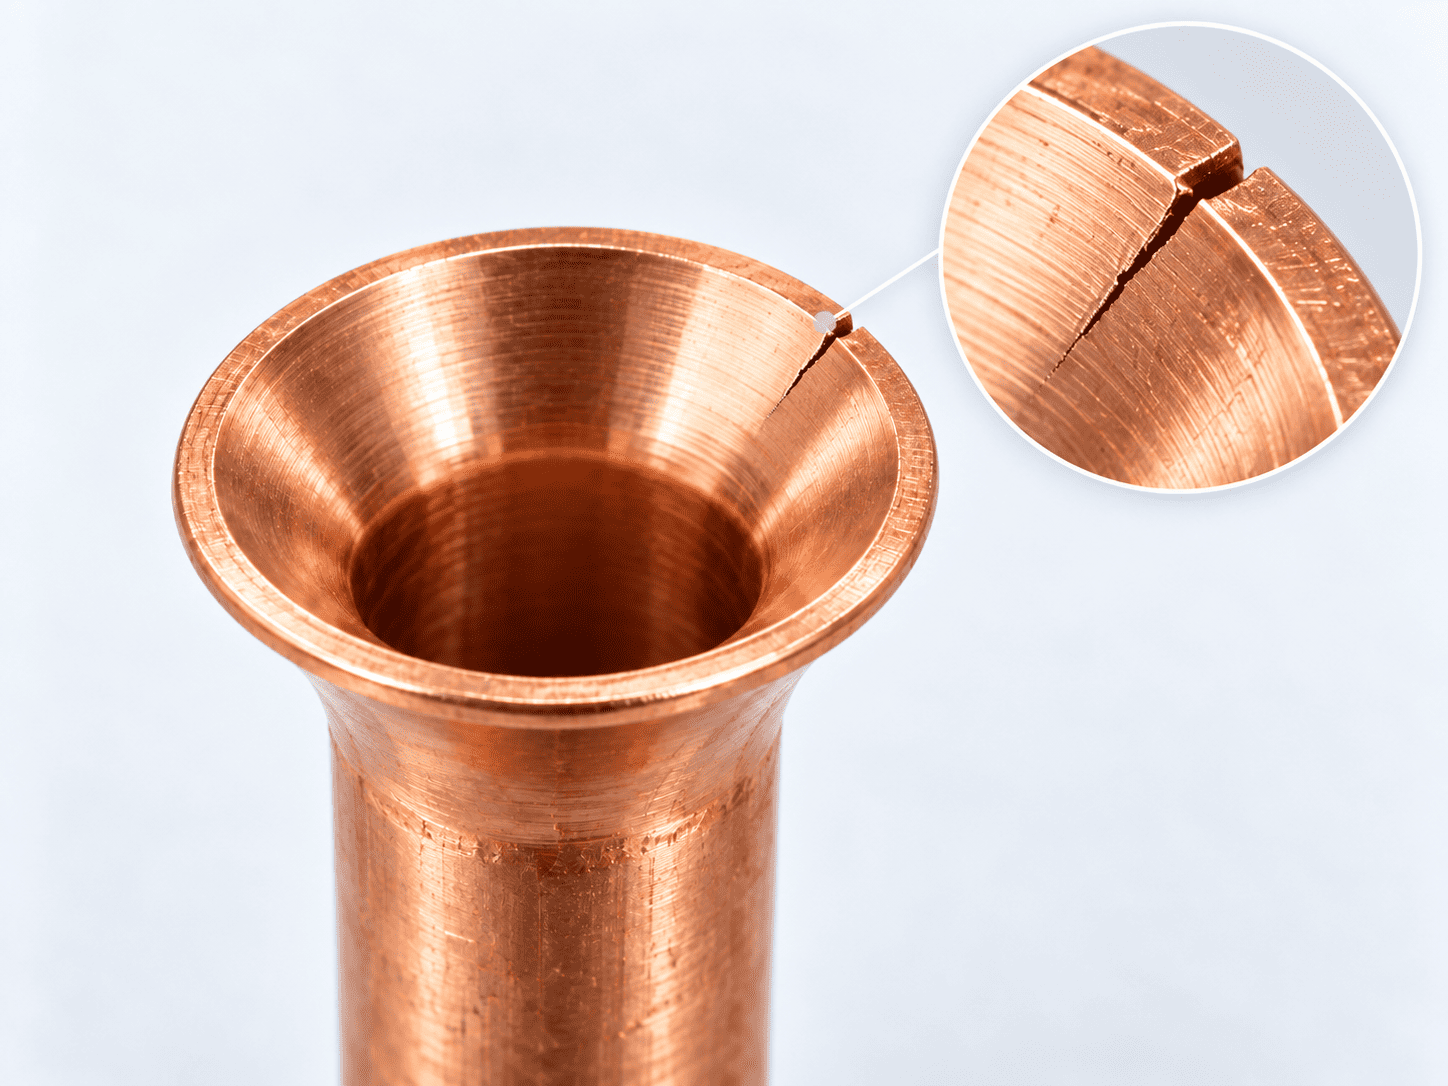
Crack in the flare
Why might it crack?
Start by checking from a few angles:
- Whether too much tube length was left exposed above the clamp
- Whether too much downward force was applied during flaring
- Whether the cut end was uneven or still had burrs
- Whether the tubing itself was suitable for flaring
Especially with flaring, deeper is not always better.
Excessive force keeps stretching the tube wall — over-forming it this way can actually thin out the tube end or even crack it.
So when you see a crack, rather than trying to push ahead with the connection, it′s more important to go back and find out where the process went wrong.
5|Problem 4: Uneven Thickness
What does it look like?
A normal flare should stay relatively even all the way around.
If, once finished, you see:
- One side noticeably thicker
- One side thinner
- Inconsistent height around the flare
- The overall shape is asymmetrical
it means this flaring result needs to be re-checked.
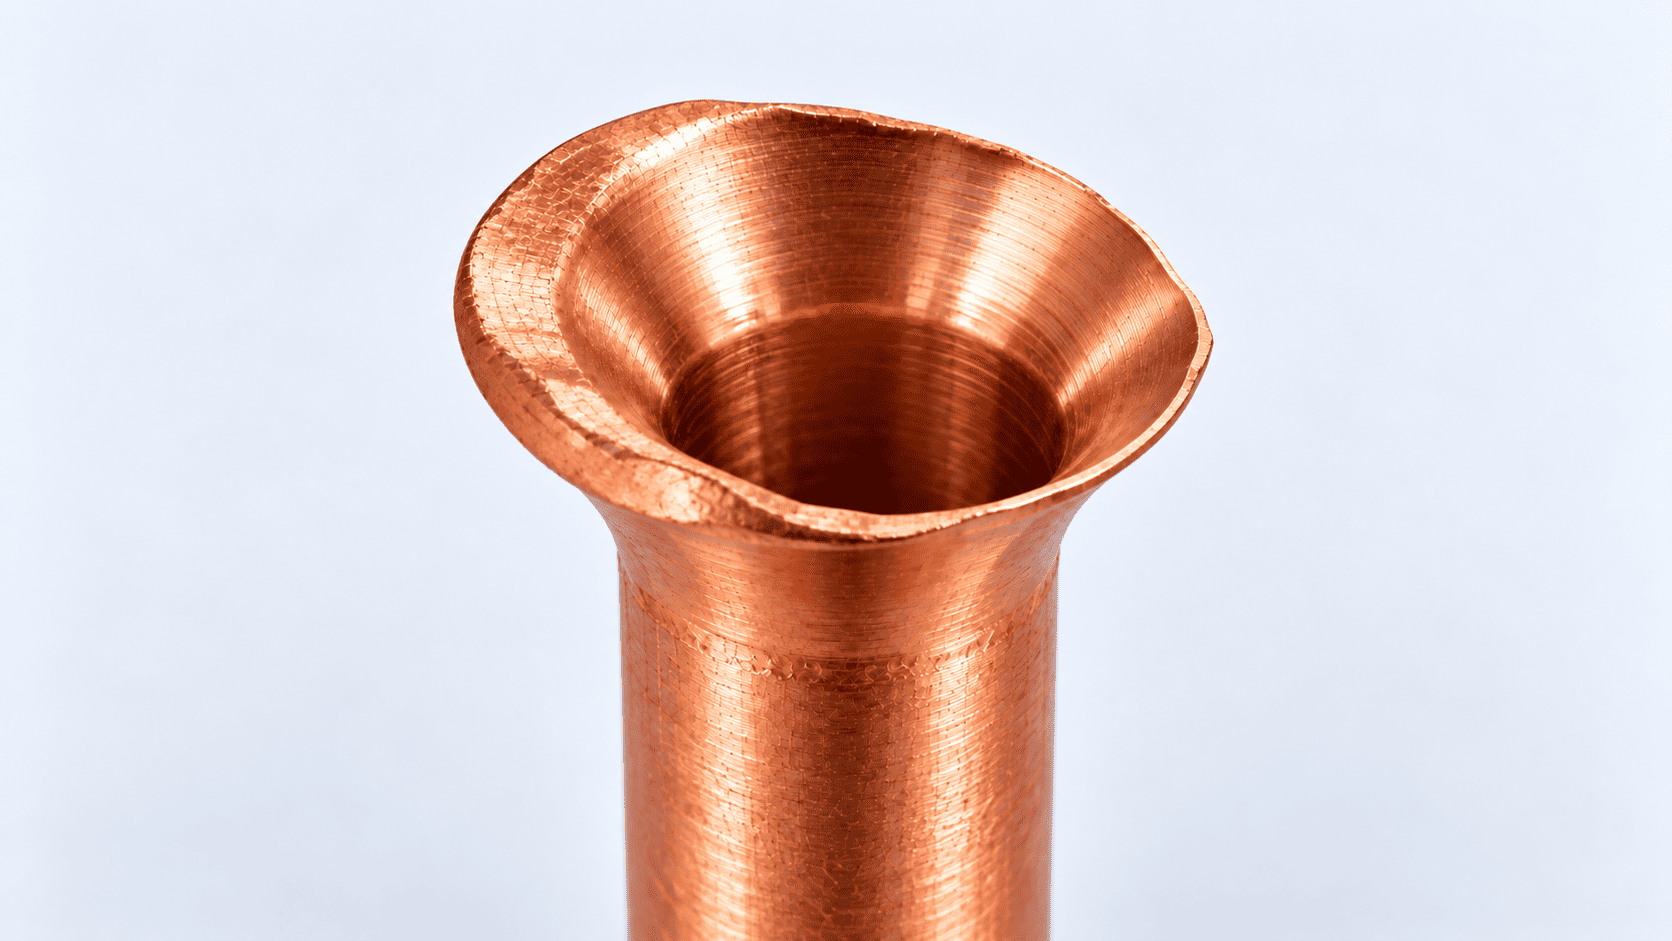
Uneven thickness
What should you check first?
When you run into uneven thickness, check in order:
- Whether the copper tube was clamped straight
- Whether the tubing shifted while being secured
- Whether the flaring cone is centered
- Whether the force applied during the process was steady
This kind of issue usually can′t be traced to a single cause from the finished part′s appearance alone.
So the more practical approach is to check clamping, centering, and applied force one at a time.
6|If the Flare Is Defective, Can You Just Tighten It Down Anyway?
Not recommended.
If the flare already shows:
- Clear crookedness
- Surface damage
- Cracks
- Uneven thickness
don′t expect to fix it just by tightening the nut harder.
Over-tightening can actually put even more stress on a flare that already has a problem.
A safer approach is:
Cut off the defective tube end, clean up the tube, and flare it again.
Keep it simple:
If the forming is off, don′t force it into service.
Conclusion|Don′t Skip This Last Step After Flaring
The last step in flaring isn′t loosening the tool — it′s checking the flare itself.
Do a quick check:
- Is it crooked?
- Is the surface damaged?
- Is there a crack?
- Is the thickness even all around?
A normal flare should have a smooth surface and even forming all around, with no visible scratches or cracks.
If you spot anything unusual, don′t rush into the next connection step.
Finding the problem and fixing it first, before connecting, is the safer way to go.
Learn the tool. Enjoy the work.
FAQ|Common Flare Questions
Q1: The flare only has a tiny crack — can I still use it?
Not recommended.
A crack means the flare′s forming is already incomplete. If you spot a clear crack, it′s best to cut off the defective tube end and flare it again, rather than going straight into the connection.
Q2: Is it fine if the flare surface has a small scratch?
The inside of a normal flare should stay smooth.
If you can already see clear scratches, dents, or other surface damage, you should re-check the forming result first.
Q3: Why is one side of the flare thicker and the other thinner?
Uneven thickness means the flare didn′t form evenly.
Start by checking whether the tubing was clamped flat, whether the flaring cone was centered, and whether the applied force stayed steady during the process.
Q4: If the flare isn′t good, can tightening the nut harder fix it?
Not recommended.
Extra tightening force can′t fix an underlying forming problem — it can actually put more stress on the tube end.
If there′s already a clear defect, it′s better to redo the tube end.
Q5: What′s a quick way to tell if a flare was done well?
Start by checking three things:
Whether the surface is smooth, whether it′s even all around, and whether it′s free of cracks or visible damage.
If any one of these looks clearly off, you should re-check the flaring result.
Further Reading
Want to see the full flaring procedure?
→〈How to Flare a Copper Tube: A Step-by-Step Guide to Using a Flaring Tool〉