Tools Introduction Class
Tools Feature & Advantage Introduction Class
Tools Operation and Application Class
Tools Maintanence and Repair Class
Tools Quality Checking and Certified Class
Tools Torque Introduction
Marketing Service Area
Member post
Professional Torque Tester (ZV001)
Popularity : 31258Simple Type Professional Torque Tester
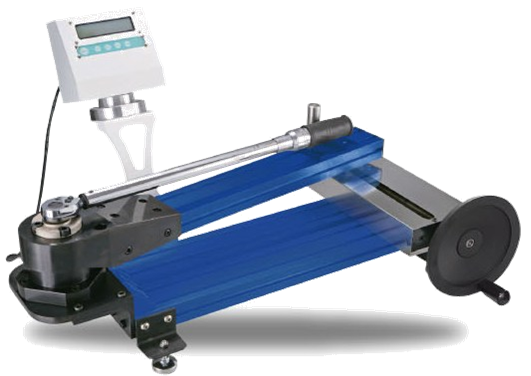
Feature
-
Induction touch panel
-
The LCD display control box can be rotated in horizontal direction.
-
Adjustable height and position of the placement of the suspended wrench is suitable for different specifications of wrenches.
-
The axis is designed with effort saving mechanism that makes high torque examination easier than usual.
-
Feature with aluminum alloy base, which is light and easy to carry.
-
Length x Width x Height (cm): 82 x 52 x 48 (The 30cm monitor hasn’t installed yet)
-
Weight: 36Kg
Specification
-
Measuring range: 40~400Nm
-
Accuracy: Reading +/-1%
-
Unit selections: Kg-cm, in-Lb, N-m and Ft-Lb.
-
Data transmitting function: The measurements will directly be sent and recorded into an Excel file on your computer.
-
Simple self-calibration: There are, except the zero point, 4 calibration points, and 5 setting modes of calibration points. Furthermore, the zero point is the commonality of different modes.
Interface Introduction

-
ZERO:
Press once can return the highest torque value of the last measurement to zero, then a new term of calibration can be implement.
-
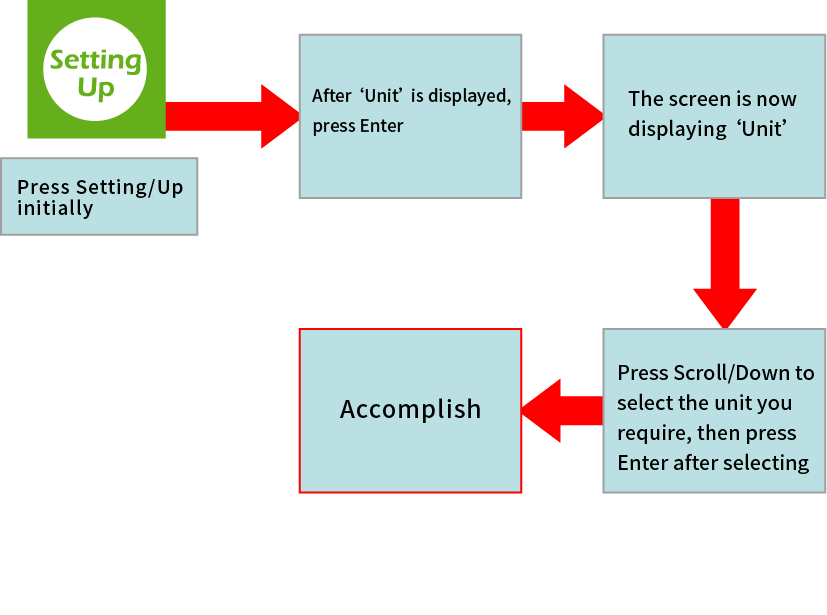
Setting/Up:
This specific button can execute 2 movements. To operate program setting, press once. When encountering lists with numbers, press once to add 1 to the value.
-
Scroll/Down:
This specific button can execute 2 movements. Press once to go to next page when entering the menu. When encountering lists with numbers, press once to minus 1 to the value.
-
Enter:
Press to enter the setting or confirm the parameters.
-
On/Off:
This is the power button of the Professional Torque Tester. Press once to turn on the machine, and the content will be displayed. Press again when finish the calibration process, and the power and display screen will shut down.
Setting Path
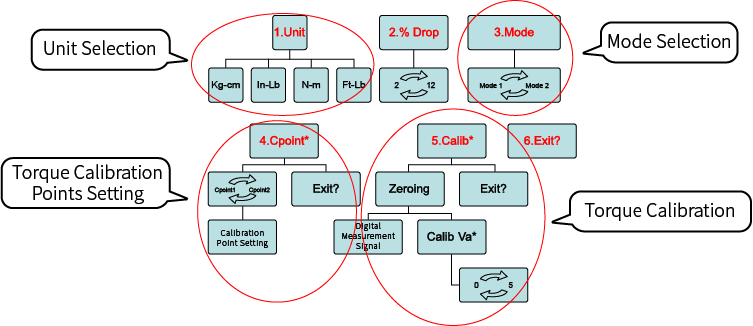
Unit Setting

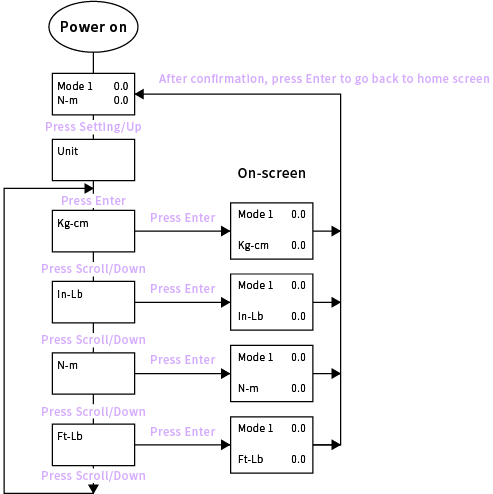
Mode Setting
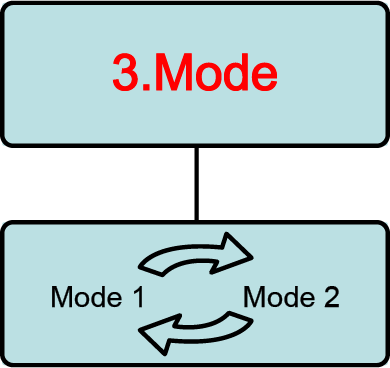
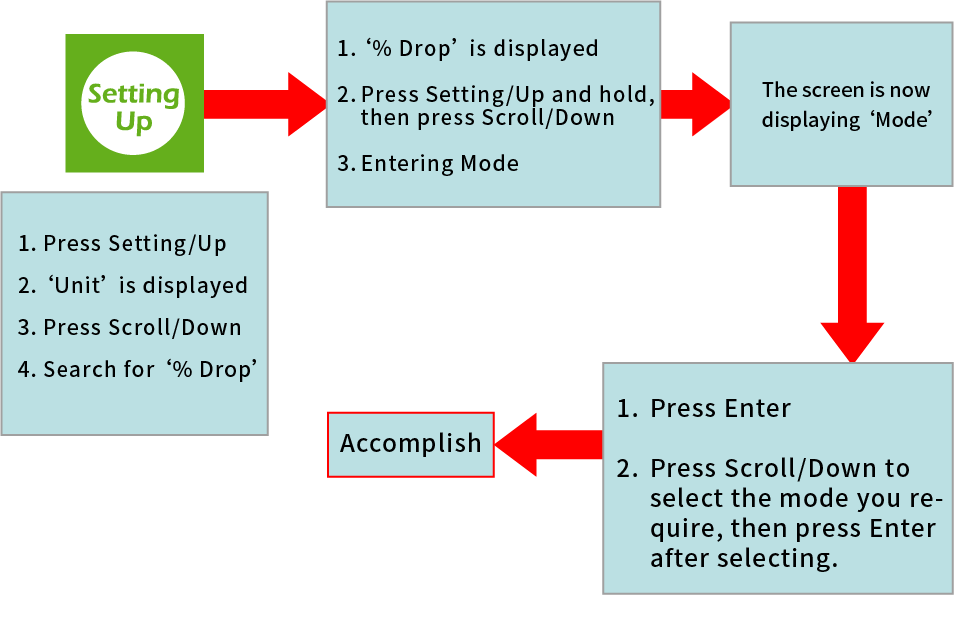
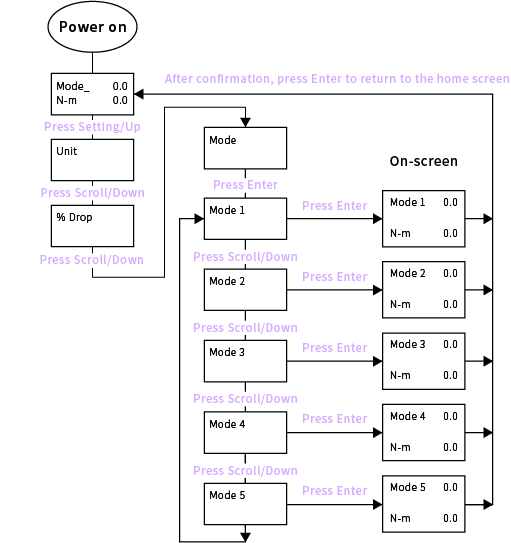
Different from the old model that has only 1 mode of 4 calibration points, the Professional Torque Tester is designed with 5 modes that allows users to set 5 sets of different values at one time and select the mode they require, which can speed up the selecting process of picking different specifications of torque wrenches.
Calibration Points Setting
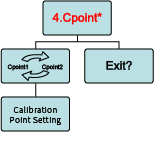
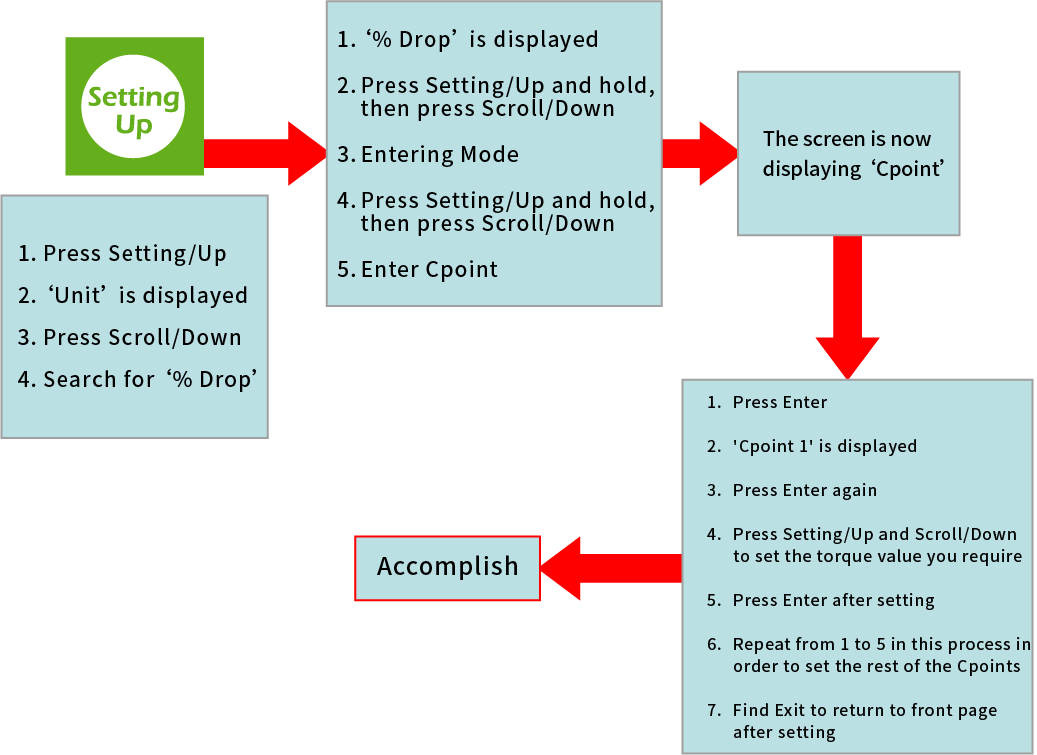
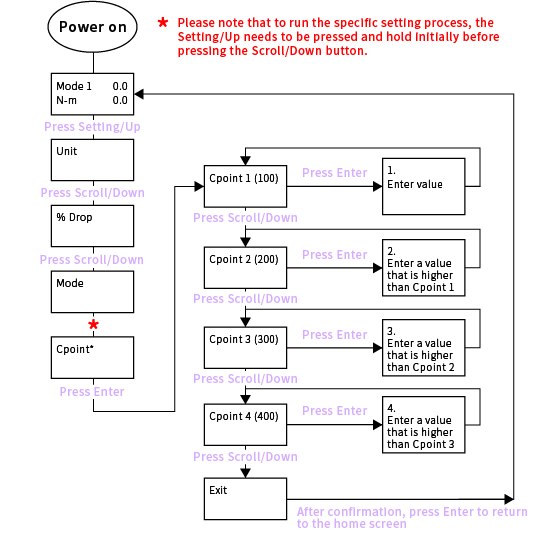
There are 5 calibration points can be set in 1 mode according to the value you require. Due to the unchangeable zero point, only 4 points are illustrated in the graph.
Calibration Setting
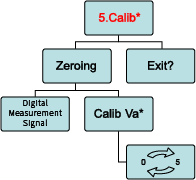
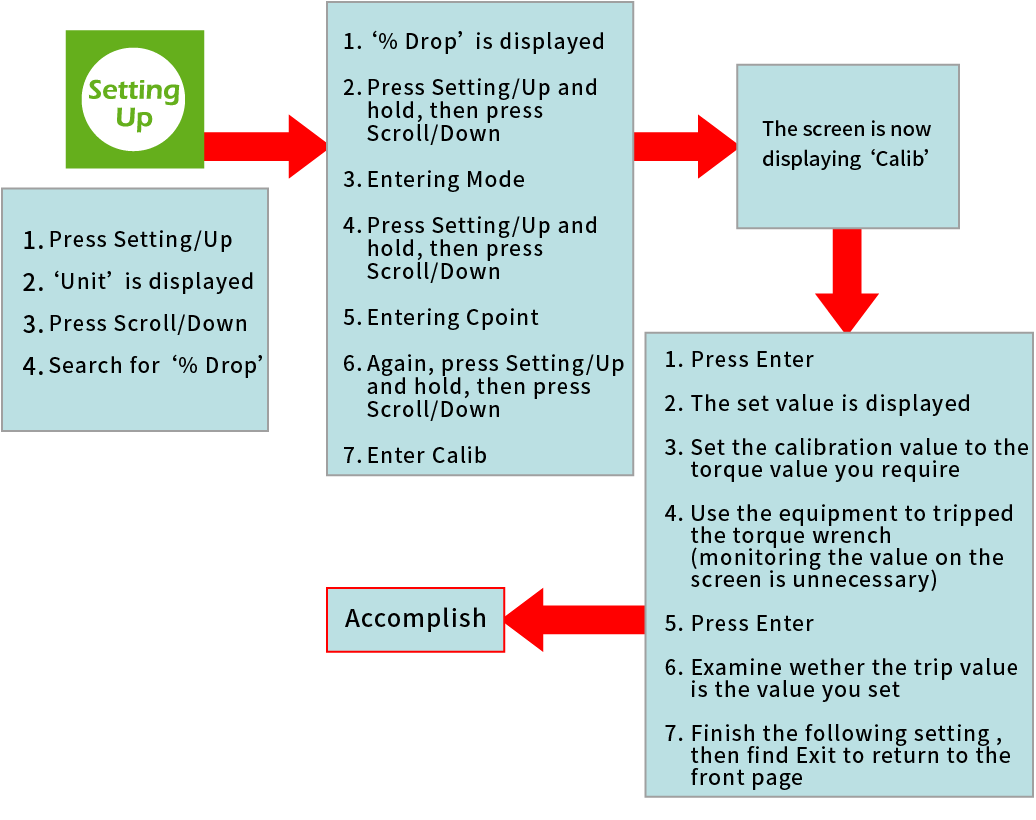
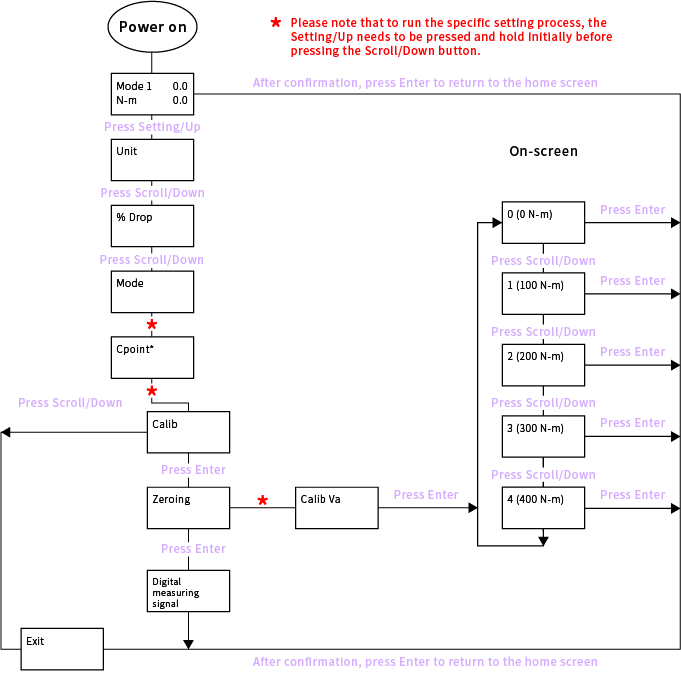
When operating the calibration, the calibration rod should maintain accurate.
Setting Steps:
Set the torque tester>Set the torque wrench>Place the torque wrench onto the torque tester to operate the tripped test.
Notice
- Place the tester horizontally on the desk in order to make the handle of the suspended wrench can also be in a horizontal condition when placing the wrench on the torque tester.
- Plug in the transformer then press the power button to turn on the torque tester.
- Set up the torque value of the torque wrench that need to be tested initially.
- Place the square drive of the torque wrench into the central plug of the tester.
- Set up all the value you require, then rotate the handle of the hand wheel in clockwise direction. Meanwhile, once the handle of the torque wrench approach horizontal, the torque value will start to elevate until the reaching the torque value you set on the torque wrench.
- 2 measurements are now displaying on the screen, which are the highest torque value on the lower right corner and the torque value at the moment on the upper right corner.
- After the testing, rotate the handle of the hand wheel in counterclockwise direction. The torque force of the torque wrench will diminish and the torque value at the moment will decrease gradually until reaching the value of zero. At last, a new term of testing can be started, the suspended torque wrench can be replaced, or the testing value can be adjusted.
- After finishing the examination, please note that the load of the torque should be fully released in order to retain the quality and service life of the product.